photobrain
Photography 101
So you want to jump into the expanding whirlwind of photographers? Here are some helpful notes to get you setup for a good first photo shoot.
Equipment
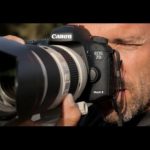
You probably have this notion that you should look like one of those photographers you see in the movies or paparazzi groups you see in the news when you think about what equipment to get. To your relief, all you really need to have is a camera that is portable and has good color reception, or in other words, will capture the colors for you. There are, at this time, a lot of options in the market that you no longer have to settle with a point-and-shoot camera. You can now acquire a DSLR for half the price than it used to sell for. For a starting photographer, I suggest that you get a DSLR as this type of camera would allow you to set manual controls and afford you to tinker with other settings that can widen your photographing range otherwise unavailable in a point-and-shoot. Most popular ones are Canon, Nikon and Olympus. These are the three names I trust. However, if we’re talking about options and flexibility, I’d go for a Canon since, not only do they have a lot of available lenses for DSLRs, but their cameras are more compatible with the other brand lenses too.
I personally like the new kind of digital that is called a BRIDGE camera. The advantages of the bridge camera are that it’s all in one package (you don’t have to carry extra lenses) and it produces results that are close to a DSLR. They are also less expensive, in general, to the more bulky DSLRs.
Manual Controls
You will notice that there a bunch of settings available in a camera. If you check your camera’s manual, you’ll find that there are programmed settings for you to easily choose from. There’s landscape, portrait, sport and macro. These settings are just preset or programmed combinations of the two items I refer to as Manual Controls. Hence, let me introduce you to aperture and shutterspeed. Aperture is a range of numbers and so is shutterspeed. The programmed settings I mentioned earlier are just preset combinations of these two. The portrait setting has a high aperture and low shutterspeed, the landscape setting has the opposite and so on. But for more flexibility, I strongly suggest you use Manual Controls. With this, you can select any aperture or shutterspeed you wish to use for any given picture at any time.
The aperture is the size of the opening of your shutter. To cut the chase short, the smaller the number, the bigger your opening is, thus more light will be rendered on your picture. Shutterspeed almost works in the same way. The smaller the number, the longer your shutter will be open to absorb light. Shutterspeed deals with time, aperture deals with the diameter. Given this, aperture of 2.8 and shutterspeed of 10 will render a very bright picture. Whereas an aperture of 9 and a shutterspeed of 1000 will render a rather dark picture. It’s up to you how to mix these two to come up with the perfect combination to capture your picture. This knowledge will enable you to take pictures even in situations when your programmed controls can no longer manage it.
Framing and Composition
Everybody can tell if a picture is nice or not after looking at it. But how can you tell if something will make a nice picture or not? This is the challenge you, as a photographer, will have to undertake. What might be interesting for others may not be interesting to you, and vice-versa. In this department, since we’re depending on your creativity and your so-called “eye” for photography, I can only leave you with two things: 1. check your frame: make sure everything is within it and leave as little dead space as you can and 2. check the available light (avoid harsh lighting) and what direction it’s coming from. Light pouring towards you will render your subject black and light pouring profusely from behind you will render your subject too bright. Check your frame if everything in it, really has to be in it. Will it distract the people from your real subject? Is it interesting enough to be in my picture? Should I do a tight shot instead? These are some of the questions you should be asking when examining your frame.
Lenses
When you purchase a camera body, it normally comes with a kit lens. Should it not come with a kit lens, then I suggest you get a kit lens before jumping to the more complex ones. Kit lens cover the normal range of aperture numbers. But then again, I don’t want to delve into this so much as you do not want to be overwhelmed with complexities that come with your lens on top of the complexities of your camera. So just to quickly give you an idea, there are several kinds of lenses. Lenses may differ in their aperture ranges and in the material the lens is made of. There are lenses that are specific to the smaller aperture numbers. There are lenses made of plastic and some of glass. Those made of glass have better color reception than the former.
Post Processing
This area is optional, but most of the mind-blowing pictures I’ve seen lately have been to some extent, post processed. Post processing involves some degree of enhancement using any one of the graphic design software. A very popular one is Adobe Photoshop. It wouldn’t hurt if you tried learning the basic enhancement techniques, not to manipulate your image altogether, but rather just to clean up your image, enhance colors and sharpen your subject. This will also prove to be helpful when you send your photos to an online printing company and see the final results.
Photography is a very technical subject at the same time highly customizable. Each photographer has his or her own style that they incorporate into their photos. The equipment can only do so much. But it still depends on you and how you want other people to see a commonplace object or perspective. So as a closing remark to beginning photographers, let me finish off with a phrase I used to take with me whenever I go shooting, remember: “safety in numbers”.


